Skip to Recipe
A few years ago, I came across this recipe for a Chocolate Covered Oreo Cake online. I thought that the idea was brilliant, but I wasn’t keen on the idea of using boxed cake mix and Cool Whip. For the record, I hate Cool Whip. Let’s just get that out of the way right now, and we can all be friends, okay? Whip your own cream, people! Assuming you have an electric mixer of some kind, you can do it! Trust me.
One of the challenges with this cake is keeping the filling from oozing out from the middle once gravity starts to do its thing. Luckily, it didn’t take long for me to discover a solution to this. Once you set your first layer of cake down on your cake board or serving dish, wrap a double layer of parchment or wax paper around the outside. It shouldn’t need to be more than 5 inches tall or so.

This cylinder will form the protective barrier that will keep your filling in place and keep the weight of your top layer of cake from pressing down too much. You can also add your glaze so that it doesn’t run down the sides of your cake. Or, you can wait until you remove the casing and then glaze your cake so that you get a little bit of drizzle. Either way works.

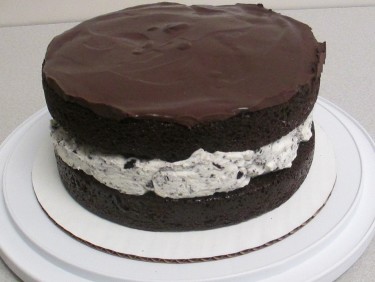
The end result is deliciousness without too much mess. I suggest cutting this cake with a warm knife, or it might get smooshed when you’re trying to cut your portions.

Chocolate Covered Oreo Cake
Ingredients
For the cake:
- 2 cups white sugar
- 1 3/4 cup all purpose flour
- 3/4 cup unsweetened cocoa powder
- 1 1/2 tsp baking powder
- 1 1/2 tsp baking soda
- 1 tsp salt
- 2 eggs
- 1 cup buttermilk
- 1/2 cup vegetable oil
- 2 tsp vanilla extract
- 1 cup hot coffee
For the filling
- 1 8oz package cream cheese, softened
- 1/2 cup white sugar
- 1 cup heavy whipping cream, cold
- 1/2 tsp vanilla extract
- 12 Oreo cookies, crushed
- 1/2 tbsp piping gel, optional
For the glaze
- 4oz semisweet chocolate, chopped
- 1/4 cup heavy cream
Directions
Phase 1: Make your cake
Preheat your oven to 350 degrees. Grease and flour two 9-inch round cake pans.
Sift your dry ingredients into the bowl of an electric mixer. Add your eggs, buttermilk, oil, and vanilla and mix until you have a smooth, thick batter. Add your hot coffee and mix until just combined (the batter will be thin).
Divide the batter evenly between the two pans. Bake at 350 degrees for 30-35 minutes, or until a toothpick or knife inserted in the center comes out clean.
Remove from oven and allow to cool on a wire rack. When the cakes have cooled completely, proceed to Phase 2.
Phase 2: Make the filling
Whip your heavy cream until it reaches the soft peaks stage. Add the vanilla extract and piping gel (if using), and continue to whip until stiff peaks form. Store in the refrigerator until ready to use.
Cream the sugar and cream cheese together until the mixture is smooth and no granules of sugar can be felt. Gently fold in the whipped cream, and then stir in your cookie crumbs.
Phase 3: Make the ganache
Place your chocolate in a heat-proof bowl. Bring the 1/2 cup of heavy cream to a boil in a small saucepan. Remove from heat and pour over the chopped chocolate.
Gently stir your chocolate and cream until all of the chocolate is melted and you have a smooth, glossy mixture. Proceed to Phase 4.
Phase 4: Assembly
Place one layer of your chocolate cake on a serving dish. Spread the cream cheese mixture on top of the cake layer, making sure not to let it go over the sides of the cake.
Top with your second layer of chocolate cake. If the cream filling starts oozing out, you can try pushing it back in with your spatula. Alternately, you can also wrap a piece of parchment or wax paper around your cake so that the filling stays in place.
Pour your chocolate ganache over the top of the cake, starting in the center and working your way outward in a circle until the top of the cake is completely covered. You may have some ganache left over.
All the cake to rest for 10-15 minutes, then refrigerate until ready to serve.
Leave a Reply